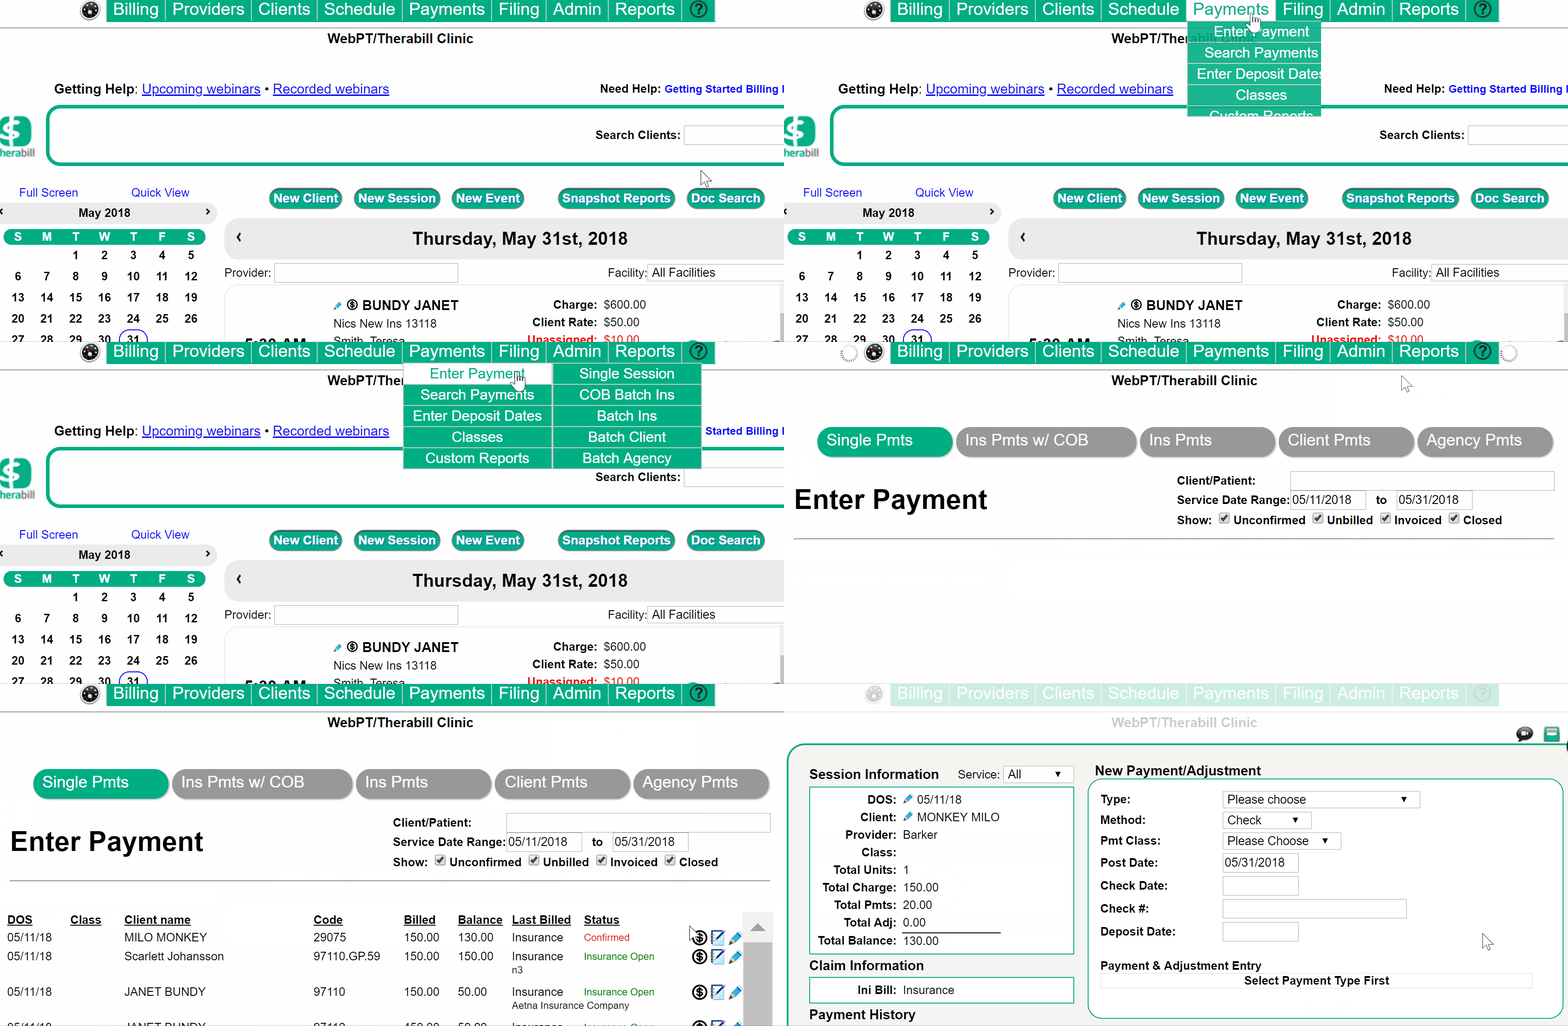
Throughout the app, there are several different screens you can use to post payments. We are going to cover the most versatile of these payment entry forms: Single Session.
There are 2 reasons why this method is the most versatile:
- You can access this screen multiple ways
- You can post any type of payment (excluding unassigned)
How do I get to the Single Session payment screen?
Single Session can be accessed using the  icon found all throughout the program. This is a list of many, but not all, of the screens that host the Enter Payment icon:
- Single Session
- Edit Session window
- Bill Insurance
- Client Balance Statement
- Search Sessions
- Dashboard
Note: The  icon seen at Client > Client List takes you to the Batch Client screen, not Single Session.
Single Session Layout
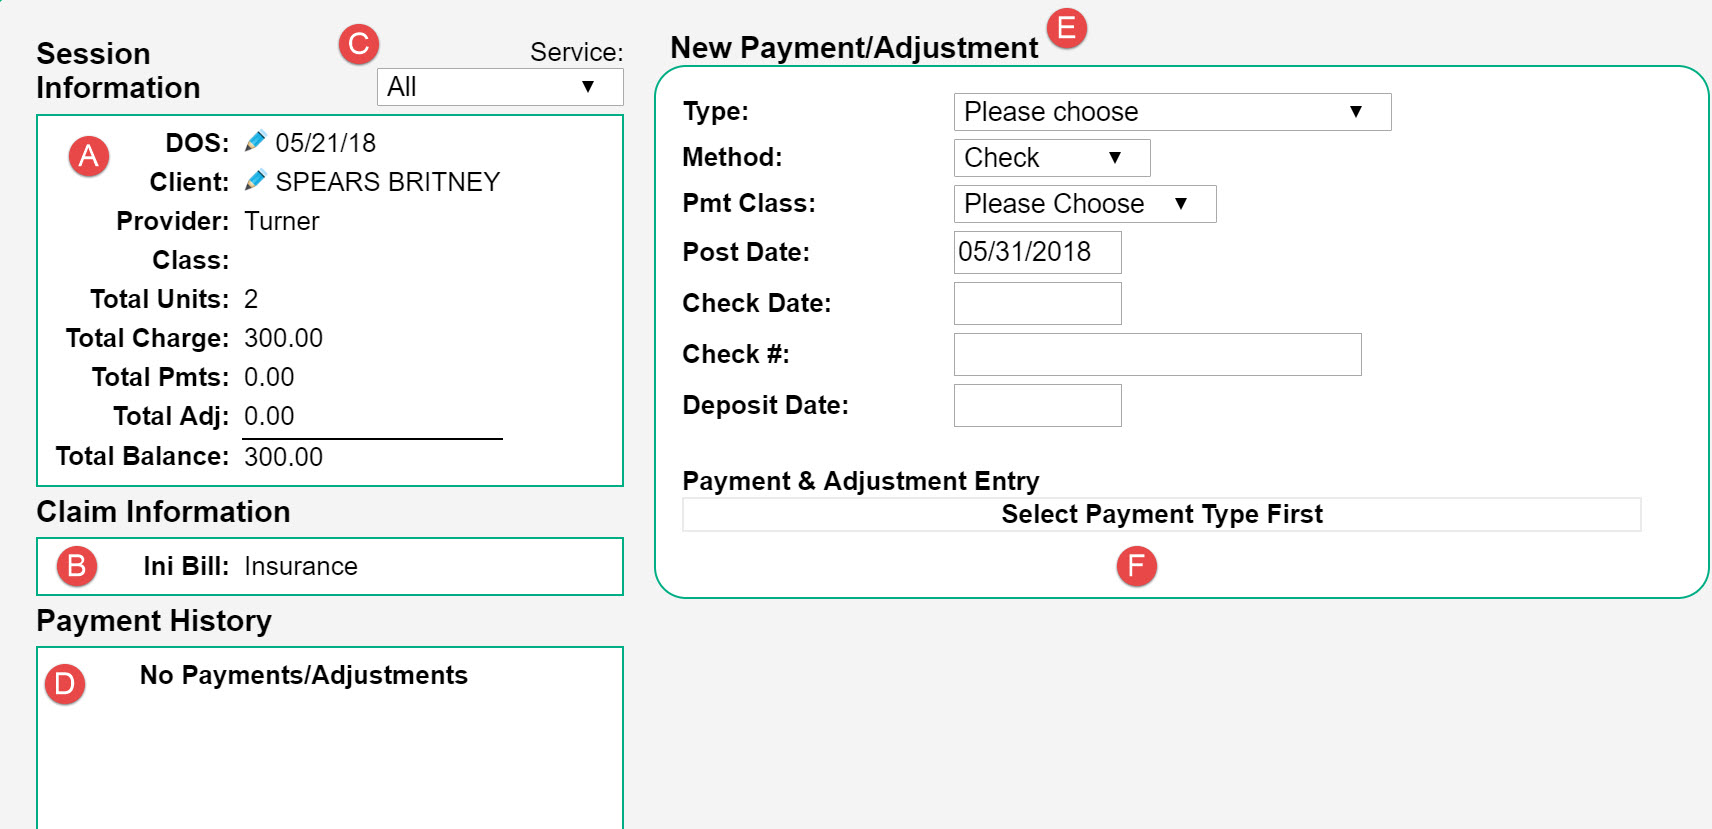
A - Provides basic information about the session. This is a convenient place to see the remaining balance on the session.
B - Informs you of the Initially bill to status of the session (i.e. Client or Insurance). You can also see the current status of each service line.
C - You can use this drop-down to select a specific service code. Doing this will change the information in A,B, and C to reflect that code.
D - This area will show you all payments/adjustments that have been applied to the session. Information that will be included is the date, amount, and type of payment. If it is an insurance payment, the name of the payer will be listed.
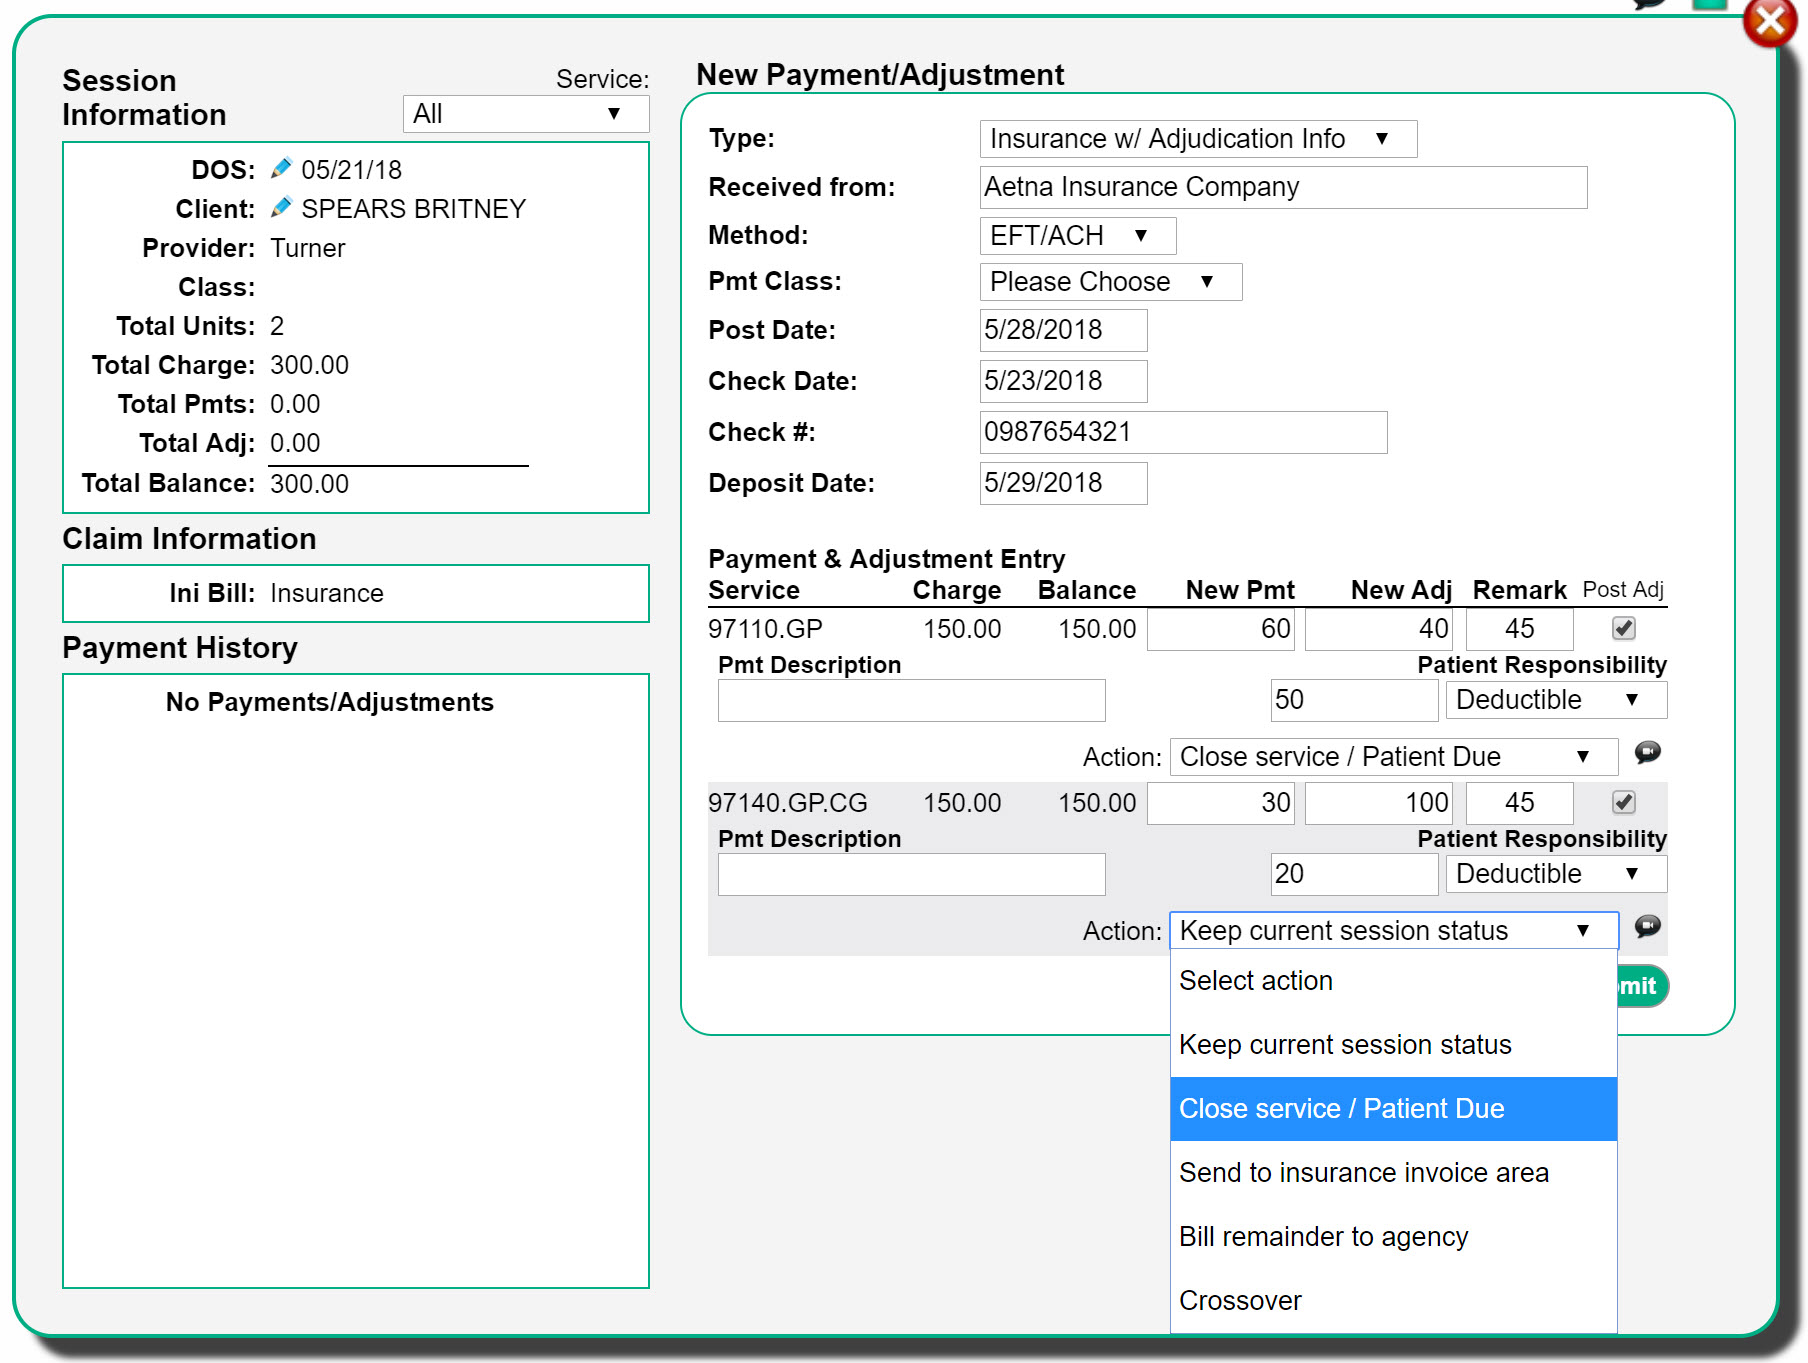
E - This is the form that is used to post a payment.
F - The service lines will appear here after a Type of payment is selected. When you are entering information in a field on a specific service line, you will notice that A, B, and C change to reflect the details of that code.
Entering a Payment/Adjustment
When you are ready to enter a payment, follow these steps:
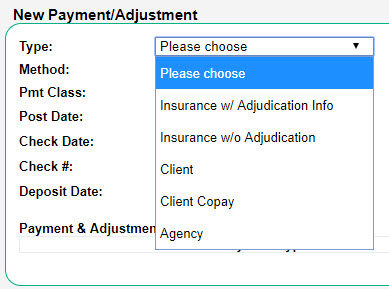
- Select the payment Type you are wanting to enter. You can choose from Insurance w/ Adjudication, Insurance w/o Adjudication, Client, Client Copay, or Agency. Note: Client and Client Copay are not typically used by integrated clinics, as client payments should be entered into WebPT.
- Based on the Type you have selected, you will have different payment metadata that you can record, such as Method, Post Date, Check/Auth Date, Check/Auth #, and Deposit Date. Not all fields are required, but the more fields you input allows for more detailed reporting. If you are entering an insurance payment, the Received from field will populate with the payer the session is currently open to.
- Insurance w/ adjudication info should be used if you are needing to send the claim to an additional payer after posting the payment (i.e. secondary insurance). Otherwise, Insurance w/o adjudication will suffice.
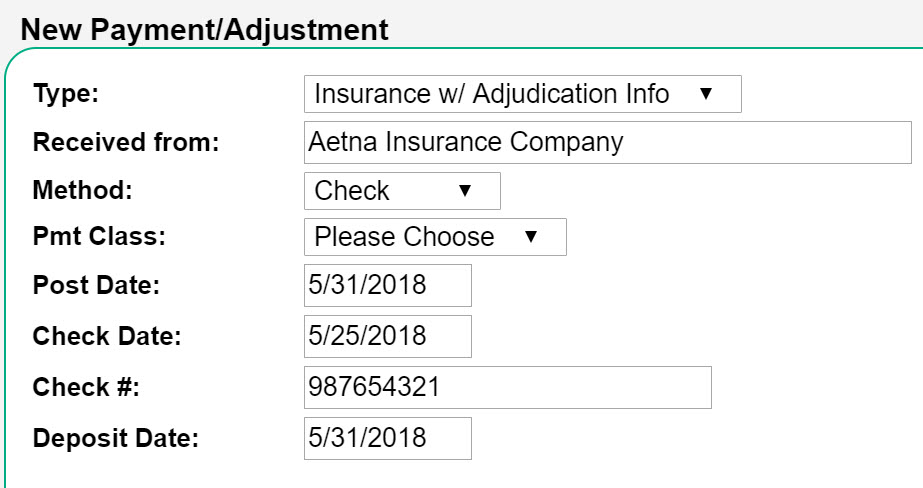
- Insurance w/ adjudication info should be used if you are needing to send the claim to an additional payer after posting the payment (i.e. secondary insurance). Otherwise, Insurance w/o adjudication will suffice.
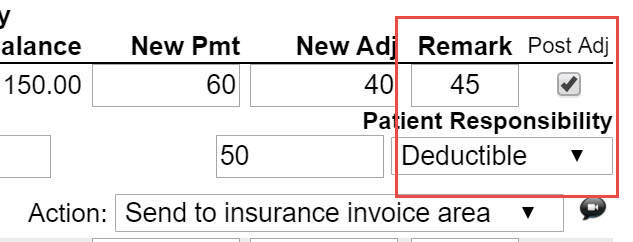
- Enter the payment information into their respective fields. This can include a payment amount, adjustment amount, remark code, patient responsibility amount and type, and payment description. Payment descriptions only show on the Payment Method Breakdown report and Custom Payment reports.
- For Insurance w/ Adjudication Info - Be sure to enter a Remark code, check the Post Adj box, and choose the type of Patient Responsibility (Copay, Deductible, or Coinsurance). This is required information when billing an additional payer.
- Select the appropriate Action. For more information, please see: Session Action
- Click Submit.

Comments
0 comments
Article is closed for comments.