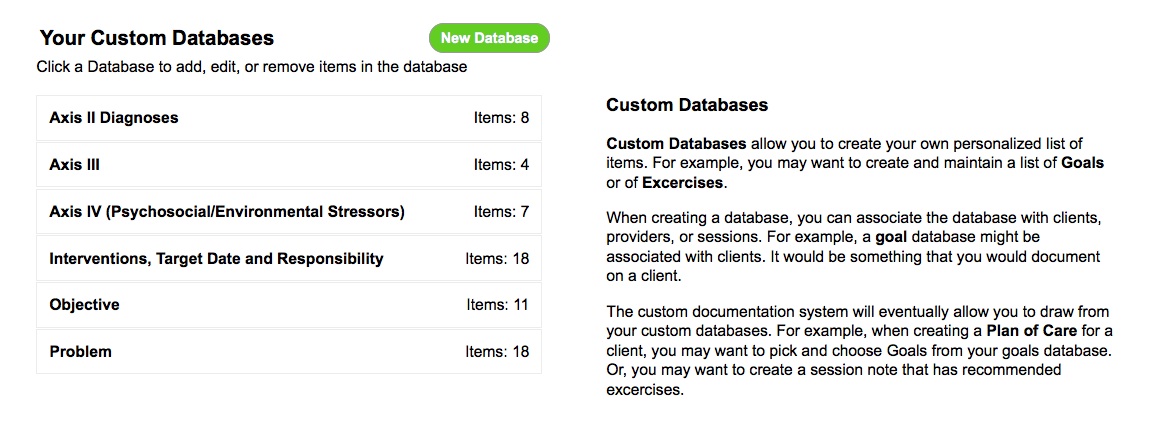
What are custom databases?
Really, it is just a way for you to create your own lists of items. The best example we can come up with is a Goals Database or an Exercises Database. You could use the custom database feature to create a database called Goals (or Exercises). You could then populate the database (add entries) with your lists of Goals (or Exercises). The custom databases are not restricted to Goals and Exercises. We know from past experiences with our customized features, that our Therabill members can be quite imaginative and you will find many uses for custom databases.
What uses do custom databases have?
This feature, by itself and in its current developmental stage, may not seem too useful. However, this new custom database tool will be tied in to the new custom documentation feature in the near future. For example (keeping with the Goals example), you may want to create a "custom note" in the custom documentation system for "Plan of Care". You may want to list a set of Goals for the patient/client within the plan of care. The custom databases will eventually allow you to select Goals from your Goals database to include on your Plan of Care for a client in Therabill.
Anything else going to be added to it?
Yes. We do plan on developing it a little further. For example, we already have plans to let you attach pictures to your entries in the custom databases that you create. For example, if you are creating a custom database for Exercises. You may want to add a picture for each of those entries showing an example of the exercise.
How do I get started?
We have put the initial launch of custom databases in the Admin area. We will eventually incorporate them in other areas of Therabill. But for the initial release, we had to put it somewhere and Admin seemed as good of place as any. To get to custom databases, do the following.
- Put your mouse over Admin in the top navigation bar of Therabill.
- Click Custom Databases in the drop down sub-menu (the menu that appears directly under the main navigation bar when you click on an area in the main navigation bar).
Adding a Database
You will first want to think of a name for your database. The name should be short but descriptive. For example, Goals or Exercises. You may even want to be more specific (remember, you can create as many databases as you need). For example, you could create a Feeding Goals database.
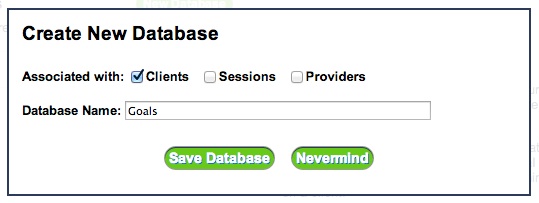
 To add a new database, click the New Database button. You will then see the form shown in the image to the right. You will give the database the name that you decided to name it by entering that name in the text box labeled Database Name. The other parameter is telling Therabill what you want to Associate this database with.
Associate With
This will be used within future developments of the custom documentation system. For example, if you create a custom document that is associated with a client (i.e. Plan of Care) and you want to be able to draw from this custom database from the client documentation, then you should put a check mark next to Clients. If you want to be able to draw from this database on a note that is associated with a session (i.e. Progress Note or Evaluation) then you will want to put a check next to Sessions. It is perfectly okay to associate the database with all three (Clients, Sessions, and Providers).
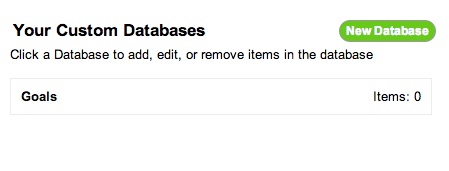
 Once you have entered the database name and chosen the associations, then click the Save Database button at the bottom. Your database will now be created. In this example, we created a Goals database. The database is now shown in your database list (see image to the right).
The database listed is showing the name of the database and the number of items (or entries) you have entered into that database. Initially, the number of items will be zero.
Click on the database entry to manage the database (i.e. add items to the database, change the name of the database, or delete the database). Clicking on the database entry will open up the form seen below.

Managing the database
Initially, your database will be empty and you will see the blank database above. Before we go into adding items to the database lets go over a couple of other things you can do from the form shown above.
- Edit the database name - Click the edit icon next to the database name at the upper left to change the name of the database.
- Delete the database - Click the "Delete This Database" link at the bottom right to delete this database. Warning - This will delete the database and remove all items in the database.
Adding items to the database
 To add an item to the database, click the Add Item link at the top right. You will now see the form shown to the right.
- Short Title - This should be short and descriptive. This will be what will be displayed to you when you are viewing a quick list of your goals to choose from later on (i.e. when choosing Goals on a Plan of Care). This field is required.
- Value - This is the actual text of the entry. For example, this is where you would enter the actual text of the goal. This is the text that will actually be displayed, for example, as the goal in the custom documentation.
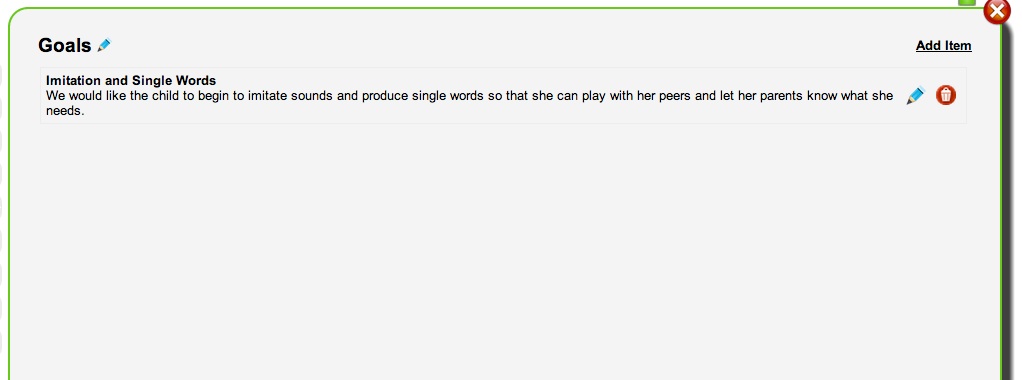
- Short Title Example: Imitation and Single Words
- Value Example: We would like the child to begin to imitate sounds and produce single words so that she can play with her peers and let her parents know what she needs.

Editing and Deleting Entries
The image above shows the "Goals" database that we have created in this example. It also shows the single entry we created called "Imitation and Single Words". As shown in the image above, each entry will have an edit icon and a delete icon associated with it. Click the edit icon to edit the title or the value of the entry. Click the delete icon to delete that single entry.
Watch the instructional video on YouTube by Clicking Here


Comments
0 comments
Please sign in to leave a comment.