Alarms give you the ability to set internal reminders within the application. They can be used for a specific client, session, or even a bucket of sessions.
Alarm Locations
You can set an alarm anywhere that you see the  icon, including:
- Dashboard Calendar
- Clients > Client List
- Schedule > Buckets
- Payments > Enter Payment > COB Batch Ins
- Payments > Enter Payment > Batch Ins
Set Alarm
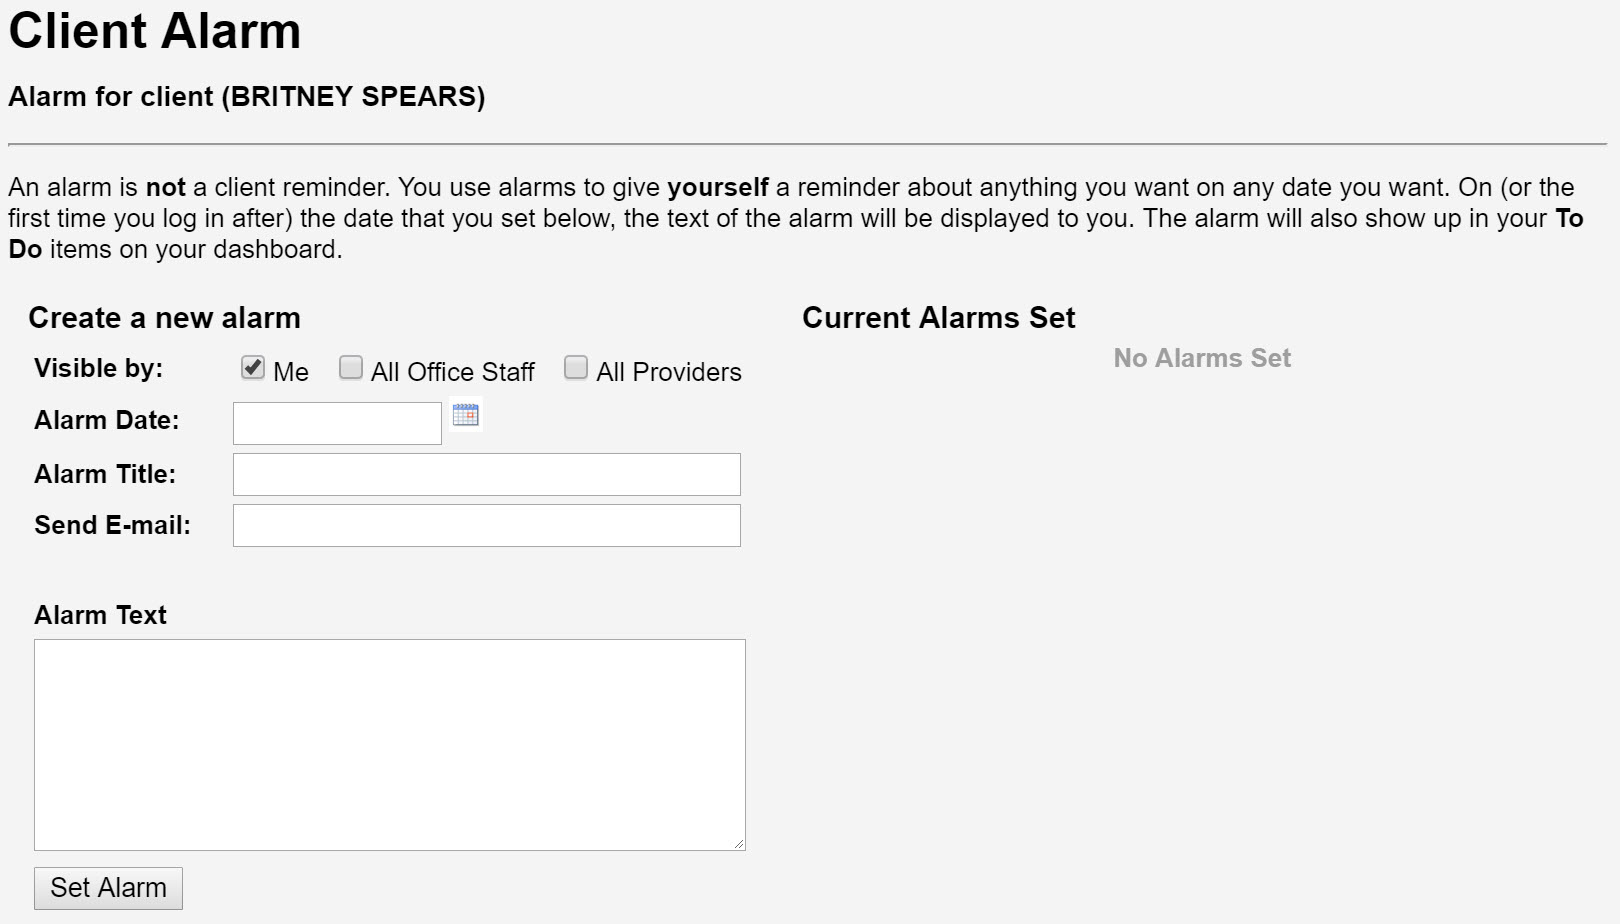
When you click the ![]() icon, you will see a form similar to this one. The top-left corner will tell you what kind of alarm you are setting and which client, session, or bucket it is for.
icon, you will see a form similar to this one. The top-left corner will tell you what kind of alarm you are setting and which client, session, or bucket it is for.

To create a new alarm, fill in the Create a new alarm form and select Set Alarm.
- Visible by - Designates who receives the alarm notification.
- Alarm Date - The day that the notification should appear. Alarms will appear the first time you log into the application that day. If you do not log into the application on that day, the alarm will appear the next time you log in.
- Alarm Title - A brief description of the alarm.
- Send E-mail - An email will be sent to the address entered into this field.
- Alarm Text - Enter a longer description of the alarm. You can enter descriptive details or instructions to be displayed on the alarm date.
Notifications
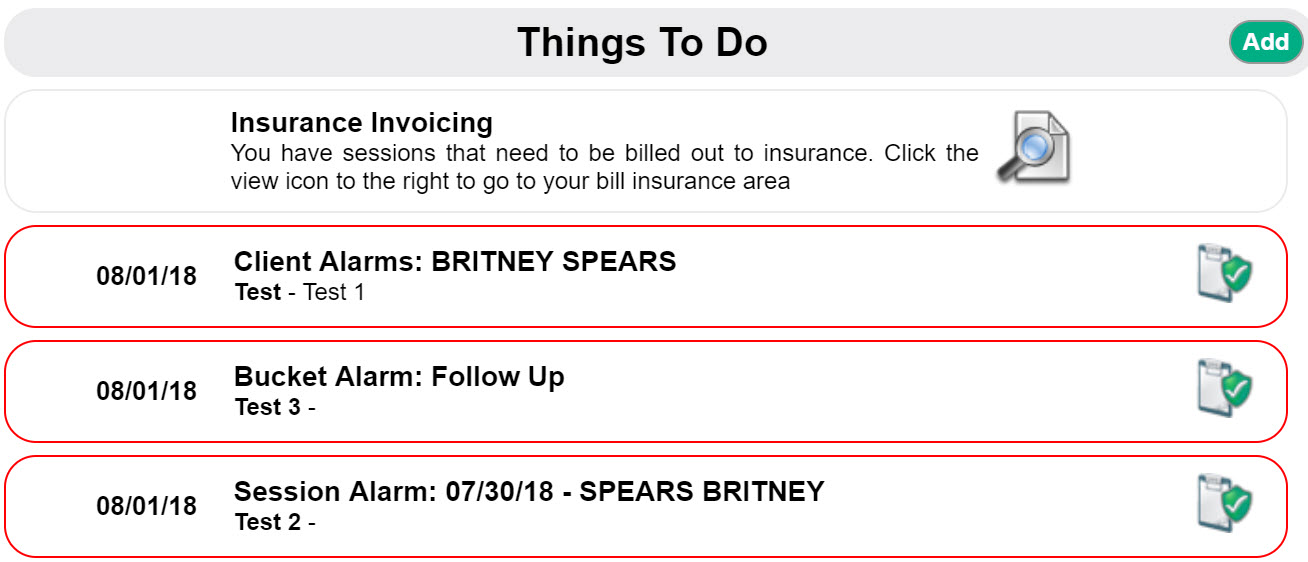
On the date of the alarm, or the first login after the alarm date, a notification will appear under Things To Do when you log into the application. 
Additionally, an email will be sent if the Send E-mail field was completed. All emails are sent at 12:00 AM CT.
Mark as Completed
Each alarm in your Things To Do list will have a ![]() icon next to it. This gives you the ability to mark the item as being completed before the alarm due date.
icon next to it. This gives you the ability to mark the item as being completed before the alarm due date.
Delete an Alarm
Alarms can only be deleted from the same form used to create it. On the right-hand side of the window, you will see a section for Current Alarms Set. Use the icon to remove the alarm.

Comments
0 comments
Article is closed for comments.