The application offers a simple method for billing your clients. You have the ability to create a Single Client Statement or Batch Statements.
Overview
Navigate to Billing > Bill Client > Balance Statement.

At the top, you will notice that the Statements button is green. This is an indicator that you are on the Client Balance Statement screen. You have the ability to move to the Client Ledger Statement and Copay Statement using the respective gray buttons.
- Open the Settings window and select your options. These customizations will affect your individual and batch statements.
 To learn more information, click Client Statement Settings.
 - If you want to create a statement for a specific date range, enter that into the Date range fields. You can also use the Date Presets button to select a premade date range.

Single Client Statement
Use the following steps to create a single client statement.
- Select a Client
After you enter a name into the Client field and select the corresponding name from the drop-down menu, a list of service lines will appear, depending on your Settings.
Each service line will show the Date of Service (DOS), Class, Service (CPT Code), number of Units, Provider, and the Charge amount. Next to the Charge amount, the system will display the Insurance/Agency total payments, Client payments, and any Adjustments that have been applied to the line. The Balance column is calculated by subtracting all payments and adjustments from the Charge amount. - Client Rates (Rare)
If you want to set up specific charge amounts for your clients, you can use this feature. It works best when there is only 1 CPT code per Date of Service.
To learn more information click, Client Rates. - Select Service Lines
After a client has been selected, you use the checkboxes to indicate what lines should be included on the statement. Additionally, you can use the Select button to select all, unselect all, or invert the checkboxes.
- Print
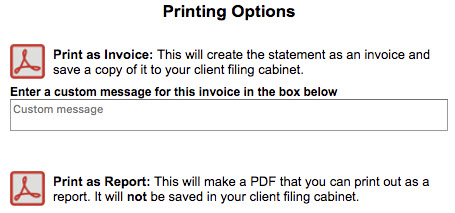
When you are ready to create your Single Client Statement, select the Print button. You will be given the option to create an Invoice or Report. To learn more click, Invoice VS Report.- Invoice: This will save a copy to your Filing Cabinet and can include a Credit Card Remit form. You can also include a custom message on the statement.
- Report: A copy is not saved in the application and there will be no area for the client to include payment information.

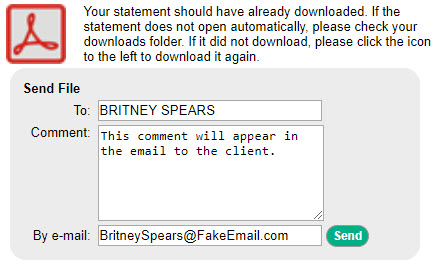
Once selected, a copy of the statement will be downloaded to your computer. - E-mail
After the statement has been created, a new window will appear. This gives you the option to include a personalized message as well. If the By e-mail field is blank, you have not entered one for that client.
Batch Statements
Use the following steps to create statements for multiple clients at the same time.
- Select Batch. The batch will use whatever date has been entered into the Date range fields.

- On the Batch Statements window, you have the ability to filter the results. You can choose to only create statements for clients with a balance, session, or any activity in the Date range.
- Additionally, you can select to only create statements for clients of a certain Session Class or Provider.
- Check one of the date range boxes (i.e. 0-29 Days) to filter the list to display clients with Patient Due charges for that range.
- When the Exclude Credit Balances box is checked, clients with a balance less than zero will become unchecked and will not be printed.
- If the list is filtered by last name name, only clients who fall within the specified last name range (e.g., A through C) will remain checked.

- Uncheck boxes on clients you do not want to create a statement for.
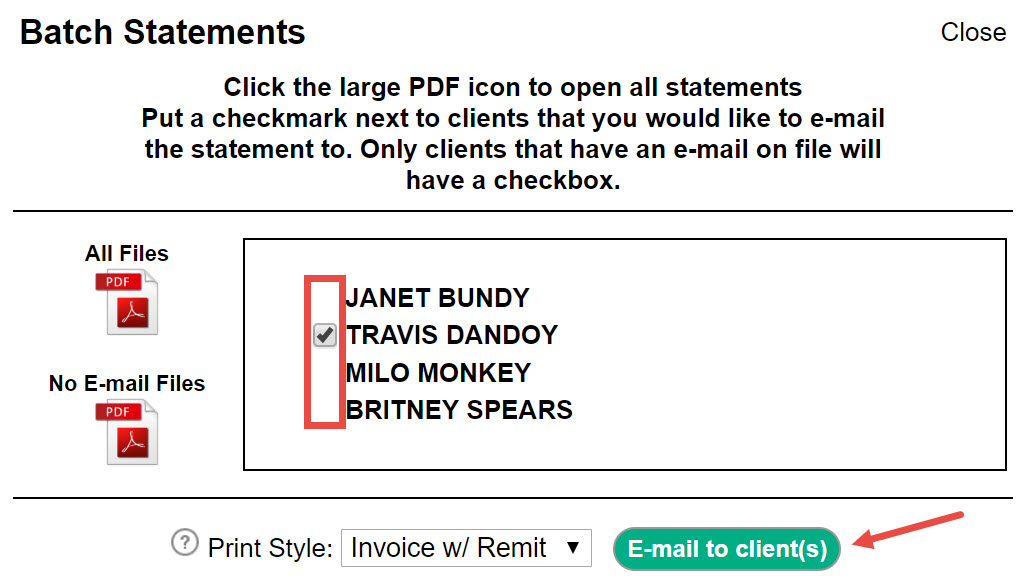
- Using the Print Style drop-down menu, select the statement type you wish to create and select Run Batch. To learn more click, Invoice VS Report.
- Invoice w/ Remit: This will save a copy to your Filing Cabinet and can include a Credit Card Remit form.
- Report Style: A copy is not saved in the application and there will be no area for the client to include payment information.
- CSV - Single File: This creates a spreadsheet that can be used with third-party client statement companies.
- If you created an Invoice or Report, use one of the PDF icons to download the statements. If you created a CSV, use the CSV icon to download the file.
- All Files: Downloads statements for all clients in the batch.
- No E-mail Files: Downloads a statement for clients in the batch without an email address.
- If you selected Invoice or Report, any client with an email address on file will have a checkbox next to their email. When you are ready to send the statement(s), select E-mail to client(s).


Comments
0 comments
Article is closed for comments.